
Mu Cang Chai and Ha Giang: The Rice Terrace Trip
Facebook X Reddit Table of Contents Two of the best landscapes in northern Vietnam sit about a province apart, and most people
Thúy Kiều (Grace) is a travel blogger and content contributor for Loop Trails Tours Ha Giang. She holds a bachelor’s degree in Sustainable Tourism from Vietnam National University, Hanoi, and has a strong passion for exploring and promoting responsible travel experiences in Vietnam’s northern highlands.
Learn more: Ha Giang Loop Tours
Cao Bang isn’t the most famous destination in Vietnam, and honestly, that’s its biggest photographic advantage. While thousands of photographers are fighting for angles at Ha Long Bay or the rice terraces of Sapa, Cao Bang offers dramatic landscapes with authentic, unhurried access. The light here is something else entirely: misty mountain mornings, golden hour reflections on water, and backroad scenes that feel untouched.
But here’s the catch: the best Cao Bang photography doesn’t happen by accident. It requires knowing where to be when the light hits right, understanding the seasonal patterns, and having the stamina to get to places early. I’ve guided dozens of photographers through this region, and I’ve seen the difference between people who chase the shot and people who just point-and-shoot.
This guide covers the best photography spots in Cao Bang, when and how to shoot them, what gear actually matters, and how to avoid the common mistakes that turn stunning landscapes into flat, disappointing files.
Learn more: Ha Giang Loop 2 Days 1 Night
Most travel photographers hit the obvious Vietnam circuits: Ha Long Bay, Hanoi’s Old Quarter, Hoi An lanterns. Cao Bang requires more effort to reach, which means fewer crowds and more authentic moments. The landscape itself is diverse: waterfalls, limestone cliffs, mist-covered mountains, quiet villages, and rivers that shift color with the light.
The real magic is the interplay of light and mist. Cao Bang sits in a region where moisture from the Red River valley creates atmospheric conditions that last for hours. You get diffused morning light without harsh shadows, perfect for landscape photography. Then the mist burns off, clouds form, and by afternoon you have dramatic contrast again.
Unlike desert landscapes where you get direct, intense light all day, or tropical jungles where everything is green and shadowy, Cao Bang gives you variable, layered light. That complexity is what makes photography interesting.
The bonus: you’re not photographing the same angles as five million other travelers. When you post a Ban Gioc waterfall photo from Cao Bang, it feels rare. Because it is.
Learn more: Ha Giang Loop 3 Days 2 Nights
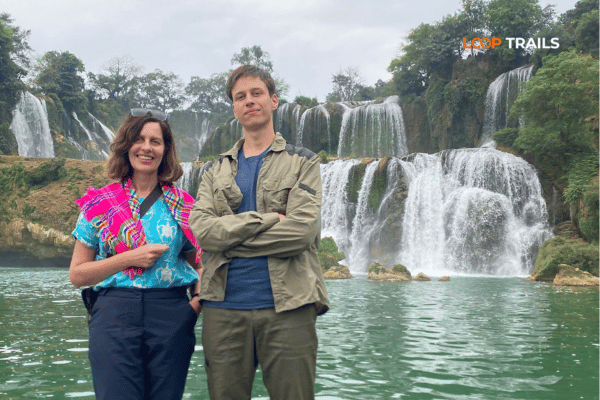
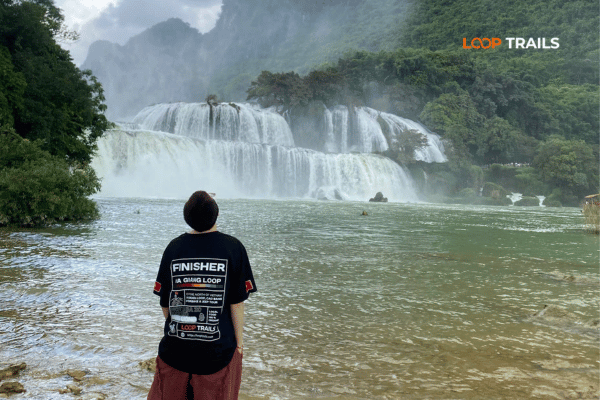
Ban Gioc is Cao Bang’s hero landscape. The waterfall is technically modest (about 30 meters), but the setting is magnificent: karst cliffs on both sides, mist rolling across at dawn, and water that shifts from turquoise to gray to silver depending on the light and angle.
The best light at Ban Gioc happens in the first 2-3 hours after sunrise. You need to be there by 5:30 a.m., ideally earlier. Yes, that’s brutal. But here’s why it matters:
Pre-dawn (5:00-6:00 a.m.): The waterfall is backlit by early light filtering through mist. This creates rim lighting on the falling water. Your foreground (rocks, vegetation) is still in shadow, which gives depth. Shoot wide: 16-35mm range. Expose for the mist and sky, let the foreground stay dark. This is moody, atmospheric stuff.
Golden hour (6:15-7:30 a.m.): As the sun clears the horizon to the east, it hits the waterfall from a side angle. The water catches orange and pink tones. The mist turns golden. This is the postcard moment. Tighter framing works here: 35-85mm. The light is directional enough to show texture and drama.
Pro tip: Bring a neutral density (ND) filter if you want motion blur in the water. 2-3 seconds of shutter speed turns the falls into silky texture. At midday without an ND filter, you’ll blow out the water highlights before the water gets that blur effect.
Common mistake: Arriving at 8 a.m. and wondering why the light feels flat. The window is narrow. The mist burns off by 8:30-9:00 a.m., and then you’re back to harsh shadows and washed-out sky until afternoon.
Afternoon light at Ban Gioc (2-4 p.m.) is different energy. The sun is high and to the west. The mist that was thick at dawn is thinner. But if conditions are right (moist air + sun angle), you can catch rainbows in the waterfall spray.
Rainbow light happens when you’re between the sun and the falls. Position yourself on the left side of the viewing area, with the sun behind and to your right. Shoot toward the waterfall. If mist and spray are heavy enough, you’ll see a rainbow arc across the falls.
Rainbows are bright and saturated. They can blow out your exposure meter. Meter for the surrounding rock faces, not the rainbow itself. Otherwise, you’ll underexpose everything else trying to protect the rainbow.
Foreground, subject, background. A common mistake is centering on the waterfall and ignoring what’s in front. Include rocks, vegetation, or river flow in the foreground. This gives scale and draws the eye into the frame.
Converging lines. The cliff faces on both sides create natural leading lines. Frame so they converge toward the waterfall, pulling the viewer’s eye there.
Horizontal vs. vertical. Vertical (portrait) orientation emphasizes height and the cliffs. Horizontal (landscape) shows width and context. Shoot both. At midday, horizontal feels more stable. At golden hour, vertical feels more dramatic.
Tripod is non-negotiable. You’re shooting in low light (early morning), and you might want ND filters or longer exposures. Handheld at 5 a.m. is not an option.
Learn more: Ha Giang Loop 4 Days 3 Nights
Phia Oac is one of the highest points in the Cao Bang Loop. The drive up is winding and rough; the reward is sunrise over a sea of mist with mountains emerging as dark silhouettes.
Phia Oac works best in late August through October when mountain mists are thick but not suffocating. By November, the air clears and you lose the atmospheric drama. May through July, mists are too dense; you see nothing.
How to shoot it:
Arrive 30-45 minutes before sunrise. Set up where you have foreground (a tree, a rock formation) and clear sightline to the east (toward the sunrise). The foreground needs to be between you and the subject mountains, so they’re silhouetted against the brightening sky.
As the sun rises, the sky transitions from deep blue to pink to gold. The mist slowly illuminates from above. The mountains transition from black to dark purple to brown. Shoot this entire sequence. The middle moments (when sky is pink and mountains are transitioning from dark to visible) are often more interesting than the moment the sun clears the horizon.
Use a wide zoom (16-35mm) to show scale. Phia Oac’s drama comes from the vastness. A tight telephoto lens loses that context.
Avoid bright, clear days. Ironic, but Phia Oac is less photogenic when there’s no mist. It becomes just a mountain landscape. The mist is what makes it special.
Learn more: Ha Giang Cao Bang 5 Days 4 Nights
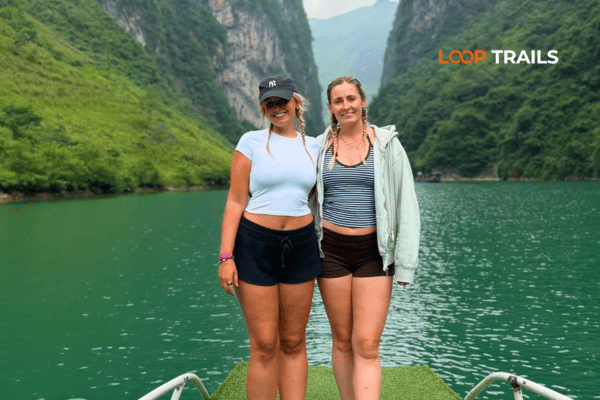
The Nho Que River runs through limestone gorges with dramatic vertical cliffs. In certain sections (especially around Cao Bang City and along the loop), it’s mirror-still, reflecting the cliffs and sky perfectly.
Reflection photography requires:
Seasonal note: May through September, water levels are higher and the river is more powerful. Reflections are less likely. October through April, the river slows and water surfaces become glassy. This is prime reflection season.
Learn more: Cao Bang Loop 3 Days best kept secret
Some of the best Cao Bang photography happens away from the famous spots. Small villages, rice terraces, local life. These scenes are less photographed but equally powerful.
Cao Bang follows the agricultural calendar. This determines what you photograph.
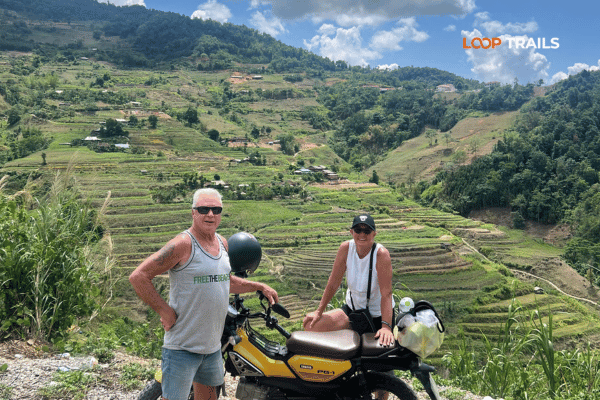
May-July: Rice is tall and green. Fields are lush. The green is saturated, sometimes almost neon. Monsoon clouds add drama. Photograph from elevated viewpoints to show the geometry of fields. Early morning shoots the green as warmer tones before harsh sun washes it out.
August-September: Rice begins yellowing. The transition from green to gold is subtle and beautiful. Golden hour shooting (early morning or late evening) enhances this color shift.
October-November: Harvest time. Fields are being cut. The landscape becomes patchy: harvested golden stubble next to unharvested golden rice. Farmers are in fields. This is action photography territory.
December-February: Fields are resting, often waterlogged. Reflections of sky and clouds in flooded paddies. Minimalist photography. The light is clearer, colors less saturated, but compositions feel cleaner.
Cao Bang villages are accustomed to tourists but not overrun. Locals are generally friendly and open to being photographed, if you ask permission and show respect.
Tips:
Learn more: Ha Giang Cao Bang 6 Days 5 Nights
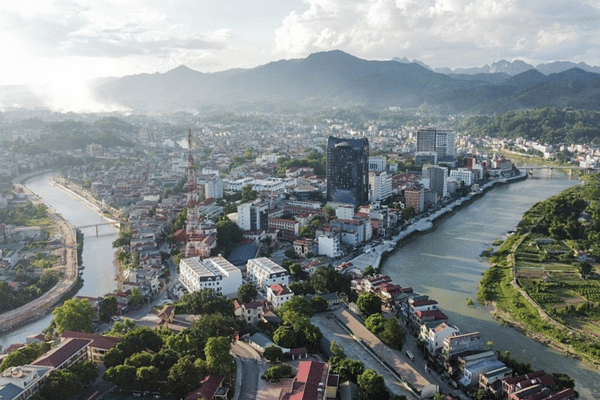
Cao Bang City itself is a photography subject: quiet colonial streets, markets in early morning, local coffee shops, fading French architecture. It’s not as visually dramatic as the countryside, but it’s authentic and increasingly rare in Vietnam.
Morning market (5:30-7:30 a.m.): Colors, activity, locals buying vegetables and meat. The light is soft (pre-sunrise to early morning). This is documentary/street photography territory. Shoot with fast film speed (ISO 800-1600) to hand-hold in low light. 35mm or 50mm focal length (or equivalent) captures scene and interaction without being intrusive.
Street scenes (6-9 a.m.): As the city wakes up, light is warm and directional. Shadows are long. This is classic street photography light. Alleys between old buildings, storefronts, people commuting. The key is observation: wait for light, subject, and moment to align.
Avoid midday. 11 a.m. to 3 p.m., the sun is overhead. Shadows are harsh and black. Colors are bleached. Nothing is interesting. Take a break, have coffee, come back in late afternoon.
Learn more: Ha Giang Cao Bang Packing List
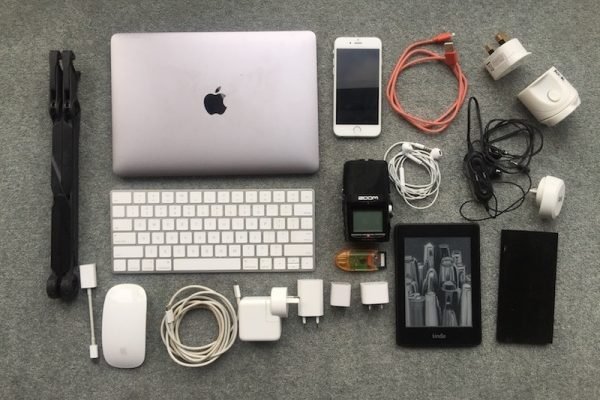
You don’t need a camera bag full of lenses to photograph Cao Bang. You need a few smart tools.
Must-haves:
Nice-to-have (but not essential):
Don’t bring:
Learn more: Best time to visit Cao Bang
Cao Bang photography varies dramatically by season. Choosing the right time can mean the difference between interesting shots and wasted effort.
Pros: Thick mists create atmospheric drama. Waterfalls are powerful (high water levels). Rice is green and saturated. Golden hour light catches mist and turns it gold.
Cons: Frequent rain (especially afternoon). Overcast skies mean no blue in the sky. Humidity fogs lenses and filters. Roads can be muddy/slippery if you’re self-driving.
Photography win: Mist-covered mountains, atmospheric waterfall shots, dramatic monsoon clouds. This is the moody, brooding aesthetic.
Pros: Clear early mornings mean defined horizons and blue skies. Water is clear (low flow in rivers). No rain to worry about. Cool temperatures (better for hiking to viewpoints).
Cons: Less atmospheric mist (for some shots, this is bad). Waterfall flow is lower (less dramatic). Fields are harvested or resting (less color).
Photography win: Crisp, clean compositions. High contrast between dark cliffs and blue sky. Sunrise colors more vivid (less haze to diffuse). Best for sharp, saturated images.
Best months overall: October and April. Transition months with mist still present but clear light breaking through. Mist + clarity = best of both worlds.
Learn more: Ha Giang Motorbike Rental
Some photographers want to go with a guide, others want freedom to explore alone. There’s value in each.
Pros:
Cons:
Best for: Photographers new to the region, those without a local guide, people who value curated access.
Pros:
Cons:
Best for: Experienced photographers who’ve shot Cao Bang before, those with a local driver or guide hired just for logistics (not time-locked schedule).
Hybrid approach: Hire a driver for 2-3 days, have them take you to spots you research. You stay as long as you want, they wait. Costs less than a formal tour, more flexibility than being on a schedule.
Learn more: Things to do in Cao Bang
After guiding photographers through Cao Bang, I’ve seen recurring errors:
Arriving too late. You read “sunrise is 6:30 a.m.” and arrive at 6:45. You’ve missed the pre-sunrise drama (the best light). For Ban Gioc, arrive at 5:30 a.m. For Phia Oac, arrive at 5:15 a.m. Give yourself 45+ minutes before official sunrise.
Shooting in harsh midday light and expecting drama. 11 a.m. to 3 p.m. is death time. The sun is overhead. Shadows are black and harsh. Skip this window. Sleep, eat, explore the town, come back in late afternoon (4 p.m. onward).
Not using a tripod because “I want to be mobile.” Mobility doesn’t matter if your images are blurry or carelessly composed. A tripod forces you to slow down and think about framing. Early morning light (when you’re most mobile) requires tripod support. Use it.
Overexposing the sky. Your camera meter sees a foreground (dark rock) and a bright sky. It exposes somewhere in the middle. The sky gets blown (white, no detail). Use exposure compensation (–0.5 to –1.5) or spot metering on the sky. The foreground will go darker, but you’ll retain sky color.
Shooting too wide. “I want to show the whole landscape!” So you shoot at 10mm. Now the subject (the waterfall, the mountain) is tiny and lost. Zoom in. Make the subject fill the frame. Context is secondary.
Not shooting RAW. JPEG is compressed. You can edit it, but you have limited headroom. RAW files are massive, but you can recover shadow and highlight detail that’d be lost in JPEG. For photography like this, RAW is standard.
Forgetting to clean your lens and filter. Dust and moisture on glass = hazy images and unwanted light flares. Bring a lens cloth and lens pen. Wipe regularly, especially after crossing misty areas.
Learn more: Visiting God’s Eye Mountain
RAW files from Cao Bang need editing. The light is often flat (mist diffuses it) or too contrasty (shadows are harsh). Post-processing recovers what your eye saw but the sensor couldn’t capture.
Essential edits:
Tools:
Start with Lightroom if you’re new to post-processing. Most Cao Bang edits happen here: exposure, white balance, clarity, saturation. You don’t need Photoshop for this work.
Learn more: Ha Giang Cao Bang Loop by Wrangler Rubicon Jeep
Any camera that shoots in RAW format. DSLR, mirrorless, even high-end phone with RAW app. The camera is secondary to the lens and light understanding. A $500 camera with good technique beats a $5,000 camera with poor technique.
Respectfully ask first. “Tôi có thể chụp ảnh?” (Can I take a photo?) in Vietnamese goes a long way. Most locals will say yes if you’re respectful.
Yes, especially at higher elevations (Phia Oac). Bring a lightweight jacket. By 8-9 a.m., it warms up. Layering is your friend.
Yes, but rain is frequent (afternoon especially). The mist creates atmospheric shots. Waterfall flow is dramatic. Weather is a gamble. If you can only go May-September, plan for rain and pack a weather-sealed camera.
16-35mm wide zoom. Shows scale and context. Waterfall itself isn’t interesting isolated; the setting makes it special
Good lighting and composition matter more. But yes, RAW editing (exposure, white balance, contrast) is part of the process. Expect to spend time on this.
Yes, many operators accept beginners. Make sure the tour size is small (4-6 people max). Larger groups are less focused on individual growth.
Roads are paved but winding. Driving rules are flexible (unlike Hanoi). If you’re not confident with manual transmission and mountain roads, hire a driver. It’s cheaper than a crash.
Sunrise shifts between 5:30-6:30 a.m. across the year (later in winter, earlier in summer). Sunset is roughly 5-6 p.m. (opposite pattern). Check sunrise/sunset times for your specific dates using a phone app or website.
Possible but difficult. You’d need a tripod, high ISO (3200+), and long exposure. Light is dim. Colors are muted. Most photographers find daytime light more rewarding. Nighttime adds novelty but not necessarily better images.
Contact information for Loop Trails
Website: Loop Trails Official Website
Email: looptrailshostel@gmail.com
Hotline & WhatSapp:
+84862379288
+84938988593
Social Media:
Facebook: Loop Trails Tours Ha Giang
Instagram: Loop Trails Tours Ha Giang
TikTok: Loop Trails
Office Address: 54A Tran Phu, Ha Giang 2, Tuyen Quang
Address: 54A Tran Phu, Ha Giang 2, Tuyen Quang
Facebook X Reddit Table of Contents Two of the best landscapes in northern Vietnam sit about a province apart, and most people
Facebook X Reddit Table of Contents Short answer: mostly no, and it depends entirely on what you mean by two days. That
Facebook X Reddit Table of Contents Twelve days is the length at which northern Vietnam stops being a highlights tour and starts